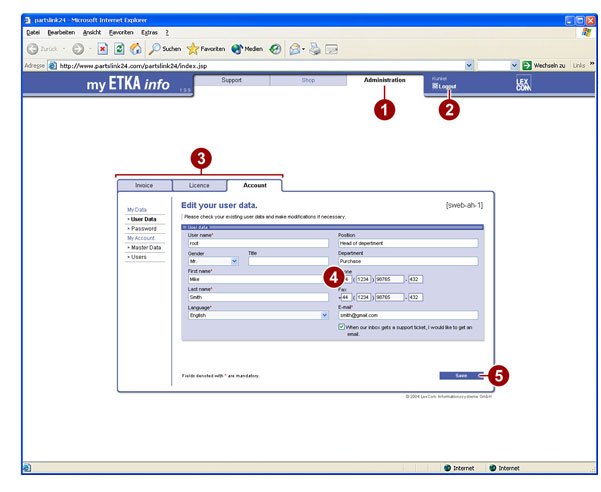
You can manage your Licences and enter or change your User Data using the ADMINISTRATION button.
1. ADMINISTRATION button.
2. Button
for logging off. After logging off, you can close Internet Explorer by clicking
on the ![]() button.
button.
3. “Invoice”, “Licence” and “Account” menu buttons.
4. Information field and/or input fields for creating or changing user data.
5. Stores the changed or created data.
You can order, extend or cancel your Lizenzen online. To do so, you must have a valid method of payment.
● Click on LICENCE.
● Click on METHOD OF PAYMENT, if required.
Check the method of payment entries and make any required changes in the input fields.
● Click on STORE if changes have been entered.
> Licences can only be ordered, extended or cancelled if the user has the necessary authorisation to do so.
In account management, you can add users and issue user authorisations. You can change the user data and password at any time. You can check the data and make any changes in the “Master data” menu, and you can check and change the stored details in the “Method of payment” menu. The following example shows the editing procedure, which also applies to other areas of management.
● Click on ACCOUNT.
● Click on USER DATA in the menu overview. The submenu opens.
● Click on ADD. The page for adding another user opens.
● Enter a user name and a New Password in the “Login data” field.
● Enter the first name, surname and e-mail address in the “User data” field.
● Select the required fields in the “User roles” field to assign them to the new user.
● Click on ADD.
> Note that all the input fields labelled with an * must be filled.